A freshly baked cake is like a blank canvas, while cake decorating supplies are like the paint and brushes: They help bring your artistic vision to life.
Over the years, I’ve experimented with tons of cake decorating tools. And while I’m still constantly finding new gadgets to try, here are the ones that have helped me make my prettiest, most professional-looking cakes yet.
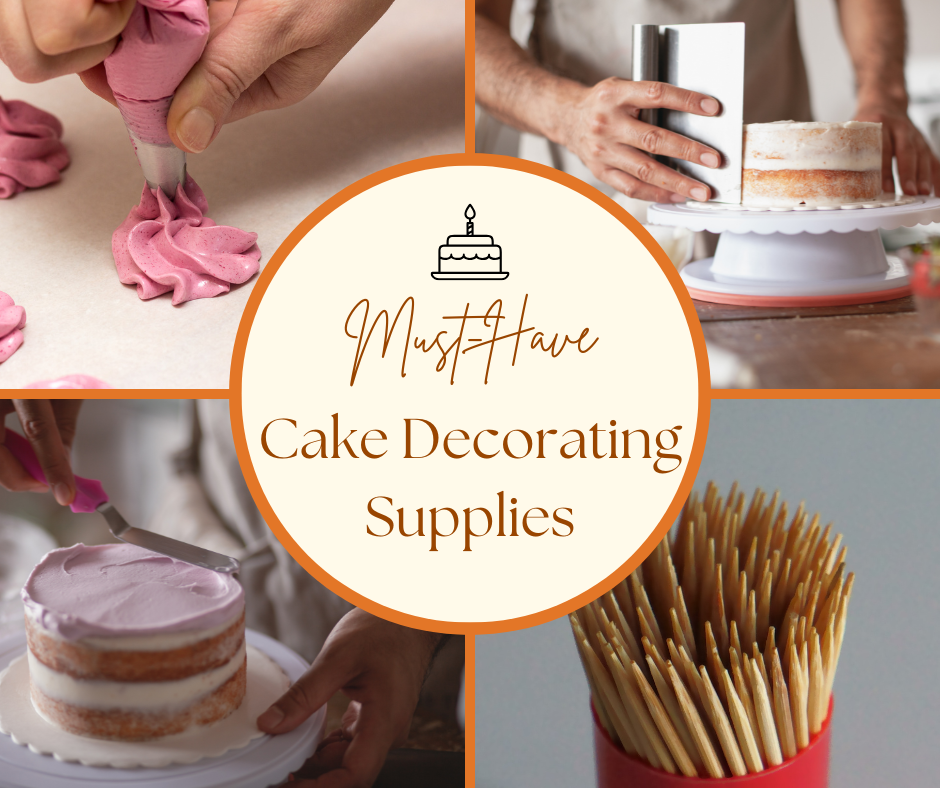
1. Rotating Cake Stand
A rotating cake stand, or cake turntable, is one of the most important cake decorating supplies. Without it, decorating a cake — especially a tiered one! — would be insanely hard.
This stand lets you smoothly rotate your cake as you frost it, ensuring your coat is even and there are no obviously unlevel or bumpy areas.
I find Kootek’s 11-inch cake turntable reliable, easy to store, and great for beginners.
2. Piping Tips
With piping tips, you can create elegant shapes and patterns, helping your cakes appear more sophisticated and even marketable (if you plan to sell).
Don’t be intimidated if you’re new to piping. Many YouTube videos and reels go over how to use piping tips to create intricate borders and popular shapes like shells and flower petals.
Just be prepared to practice a lot — I’m still practicing all the time!
In terms of what to buy, go for an assortment of basic shapes and sizes. I recommend getting 5-10 tips to start. Metal and plastic tips work equally well in my experience.
Pro Tip: Aim for medium or stiff buttercream when piping. If your frosting is too soft, it won’t hold its shape as well and you’ll end up with a mushy mess.
3. Piping Bags
You can’t use piping tips without piping bags. (Okay, technically you can swap them for small plastic baggies, but those have never worked well for me.)
Piping bags are specially designed bags that hold both your frosting and piping tips.
When decorating a cake, I almost always have multiple piping bags going, each with a different color of buttercream.
You can get disposable plastic piping bags or reusable silicone piping bags. I recently bought this set of 100 piping bags for just $7.
4. Gel Food Coloring
I hadn’t used gel food coloring before taking a cake decorating class, but now it’s all I use to liven up my buttercream.
When it comes to frosting, gel food coloring works better than liquid food coloring because it produces more intense, vibrant colors.
And since it’s not thin and runny like liquid food coloring, it won’t affect the consistency of your buttercream.
My Wilton icing colors set hasn’t failed me. It comes with all of the basic color staples in a compact box. My only complaint is that it doesn’t include black or dark blue.
5. Bench Scraper
Also used for shaping sourdough, bench scrapers are key to smoothing out frosting on the sides of cakes.
It’ll likely take a while to get good with them (I myself still want to scream when my bench scraper accidentally removes too much frosting).
But be patient! It’s normal to have to scrape, patch with frosting, and scrape again many, many times before you’re satisfied.
I recommend getting a large metal scraper and a few plastic scrapers with fun patterns and edges so you can experiment with different textures.
Pro Tip: If you’re having trouble getting your frosting to look right, run your bench scraper under hot water for a few seconds. Heat helps the frosting appear smoother.
6. Straight & Offset Spatulas
Like most bakers, I use a mix of straight and offset spatulas to frost my cakes.
Typically, I use straight spatulas on the sides of a cake and offset spatulas to smooth out both the top of the cake and the filling between each layer.
It’s best to get straight and offset spatulas in multiple sizes. You can use the larger ones to frost whole cakes and the smaller ones to fix problem areas.
Pro Tip: Use a tapered spatula to carve off rogue frosting bits along the rim of your cake. Be sure to refrigerate the cake first so the buttercream is nice and cold.
7. Cake Boards
Whether you plan to sell cakes or just want to be able to move them from one place to another, consider investing in some decorative cake boards.
Cake boards come in several sizes and colors, including white, silver, and gold.
In terms of size, aim for a board that’s at least 2 inches bigger than the diameter of your cake. It’s fine to go even bigger, especially if you plan to pipe an elaborate border, name, or message.
Here’s a quick reference chart:
| Cake Diameter | Minimum Board Size |
|---|---|
| 6 inches | 8 inches |
| 8 inches | 10 inches |
| 10 inches | 12 inches |
Like most bakers, I “glue” my cake board to my rotating cake stand using a dollop of buttercream. Then I “glue” my first cake layer to the board.
Once I’m done decorating, I can easily lift the cake from the stand and put it wherever it needs to go — fridge, kitchen countertop, car, or stomach.
8. Toothpicks
It might sound silly, but toothpicks can be extremely helpful cake decorating tools when used properly.
Their small size allows you to touch up subtle mistakes, remove stray pieces of frosting or misplaced sprinkles, and sketch out tentative shapes before piping them.
You can also use toothpicks to mix small amounts of gel food coloring into your buttercream.
9. Cake Leveler
Stacking cake layers requires symmetry and balance. But most cakes come out of the oven with a slightly domed look (mine included).
While you can still stack them like this, it’s more likely your cake will look lopsided. Worst case scenario, a whole layer could slip off!
This is why I use a cake leveler. This tool ensures that all of your cake layers are flat on top, preventing slippage and that awkward Tower-of-Pisa look.
While I adore my Wilton cake leveler, you can do all of this with a serrated bread knife. Just be extra careful as you slice your layers; not everyone is used to cutting horizontally!
Pro Tip: You can also use a leveler to torte your cake, or to cut layers in half for even thinner layers. This allows you to insert more filling or frosting between layers, resulting in a taller cake.
10. Plastic Squeeze Bottle
Plastic squeeze bottles are perfect for drip cakes — those mouthwatering, Pinterest-worthy cakes drenched in a thick, shiny glaze of ganache or icing.
Any cheap plastic squeeze bottle will work, as long as it’s leak proof with a narrow opening.
11. Flower Nail
Ready to level-up your piping skills? Cue the flower nail.
While you can pipe small flowers and rosettes directly on a cake, you can’t really do this with more intricate floral designs. A flower nail allows you to pipe elaborate flowers like roses, which you can then transfer to your cake.
Flower nails come in various sizes, but I recommend starting with a 3-inch nail, which is ideal for practicing. I have this one from Ateco.
Pro Tip: Try to get a flower lifter, too, which looks like a small pair of scissors. You’ll use this to gently lift the piped flower from the nail and then transfer it onto your cake or into the fridge for hardening.
12. Boba Straws
If you plan to make a cake with multiple tiers, you’ll need to insert dowels into the base tier to hold your cake together.
Boba straws (or smoothie or milkshake straws) work well because they’re easy to trim to match the height of your cake.
Not to mention they’re super cheap, often costing $10 or less for a set of 100.
Alternatively, you could use:
- Wooden dowels (harder to cut but very sturdy)
- Plastic cake dowels
- Giant pretzel rods (if you want everything in your cake to be edible)
Hannah is a passionate amateur baker, a prolific writer and editor, and the founder of Kneady Livin’. She is committed to providing fellow home bakers with tips, product recs, and helpful how-to guides. Her favorite baked goods to make include cakes, cupcakes, sourdough bread, cookies, and muffins. She hopes to open up her own cottage bakery in the near future.