My now-husband, Matt, and I didn’t want to throw a ton of money at a wedding. So, we decided to elope and hold a small reception a few months later.
And since I loved decorating cakes for fun, I figured, “Why not make my own wedding cake?”
While the cake was ultimately a hit, it was far from easy to make.
If you, too, want to make your own wedding cake, follow the steps below. But make sure you weigh the pros and cons before turning on your oven.

How to Make Your Own Wedding Cake in 7 Steps
1. Calculate the Size Based on Your Guest List
Before you make your own wedding cake, figure out how big the cake should be. After all, you want every guest to get a slice (or two!).
Wedding cakes tend to be multi-tiered. For a higher guest count you might make a two- or three-tiered cake, whereas for a smaller reception you could stick with a simple one-tiered cake.
Layer vs. Tier: What’s the Difference?
- Layer: The horizontal part of a cake, typically separated by filling, buttercream, or ganache
- Tier: A fully complete cake with distinct layers; a two-tiered cake, for example, consists of a smaller cake atop a larger cake (say, a 6-inch cake atop an 8-inch cake)
I chose to go very big for my wedding cake — despite only having 20 guests — because I love the look of a grand, two-tiered cake and because I wanted my guests to eat as much as they desired.
For the chart below, I calculated round cake portions for guests using “party servings” (traditional wedge-shaped slices).
But my reception was small. If you’re inviting dozens of guests, you’ll get more out of your cake if you opt for “wedding servings” (smaller rectangular slices).
Note this is NOT an exhaustive list of tier and layer combinations.
| # of Guests | # of Cake Tiers | Potential Layer Combinations |
|---|---|---|
| 1-10 | 1 | • Two 6″ layers • Three 6″ layers |
| 11-20 | 1 | • Two 8″ layers • Two 9″ layers |
| 21-30 | 1 | • Three 8″ layers • Three 9″ layers • Two 10″ layers |
| 2 | Two 6″ layers + two 9″ layers | |
| 31-40 | 1 | • Three 10″ layers • Two 12″ layers |
| 2 | Three 6″ layers + three 8″ layers | |
| 41-50 | 1 | Three 12″ layers |
| 2 | • Three 6″ layers + three 9″ layers • Two 6″ layers + three 10″ layers • Three 6″ layers + three 10″ layers • Two 8″ layers + two 10″ layers | |
| 51-60 | 1 | Three 12″ layers |
| 2 | • Two 8″ layers + two 12″ layers • Two 9″ layers + two 12″ layers • Two 8″ layers + three 10″ layers | |
| 3 | Three 6″ layers + two 8″ layers + two 10″ layers | |
| 61-70 | 2 | • Three 8″ layers + three 10″ layers • Two 10″ layers + two 12″ layers |
| 3 | • Two 6″ layers + two 8″ layers + three 10″ layers • Two 6″ layers + two 9″ layers + two 12″ layers • Three 6″ layers + two 8″ layers + two 12″ layers |
2. Pick Your Flavor(s)
Once you know how many layers (and, if applicable, tiers) your cake will have, you can start thinking about flavor combinations.
Do you want something fruity? Chocolatey? Nutty? All three?
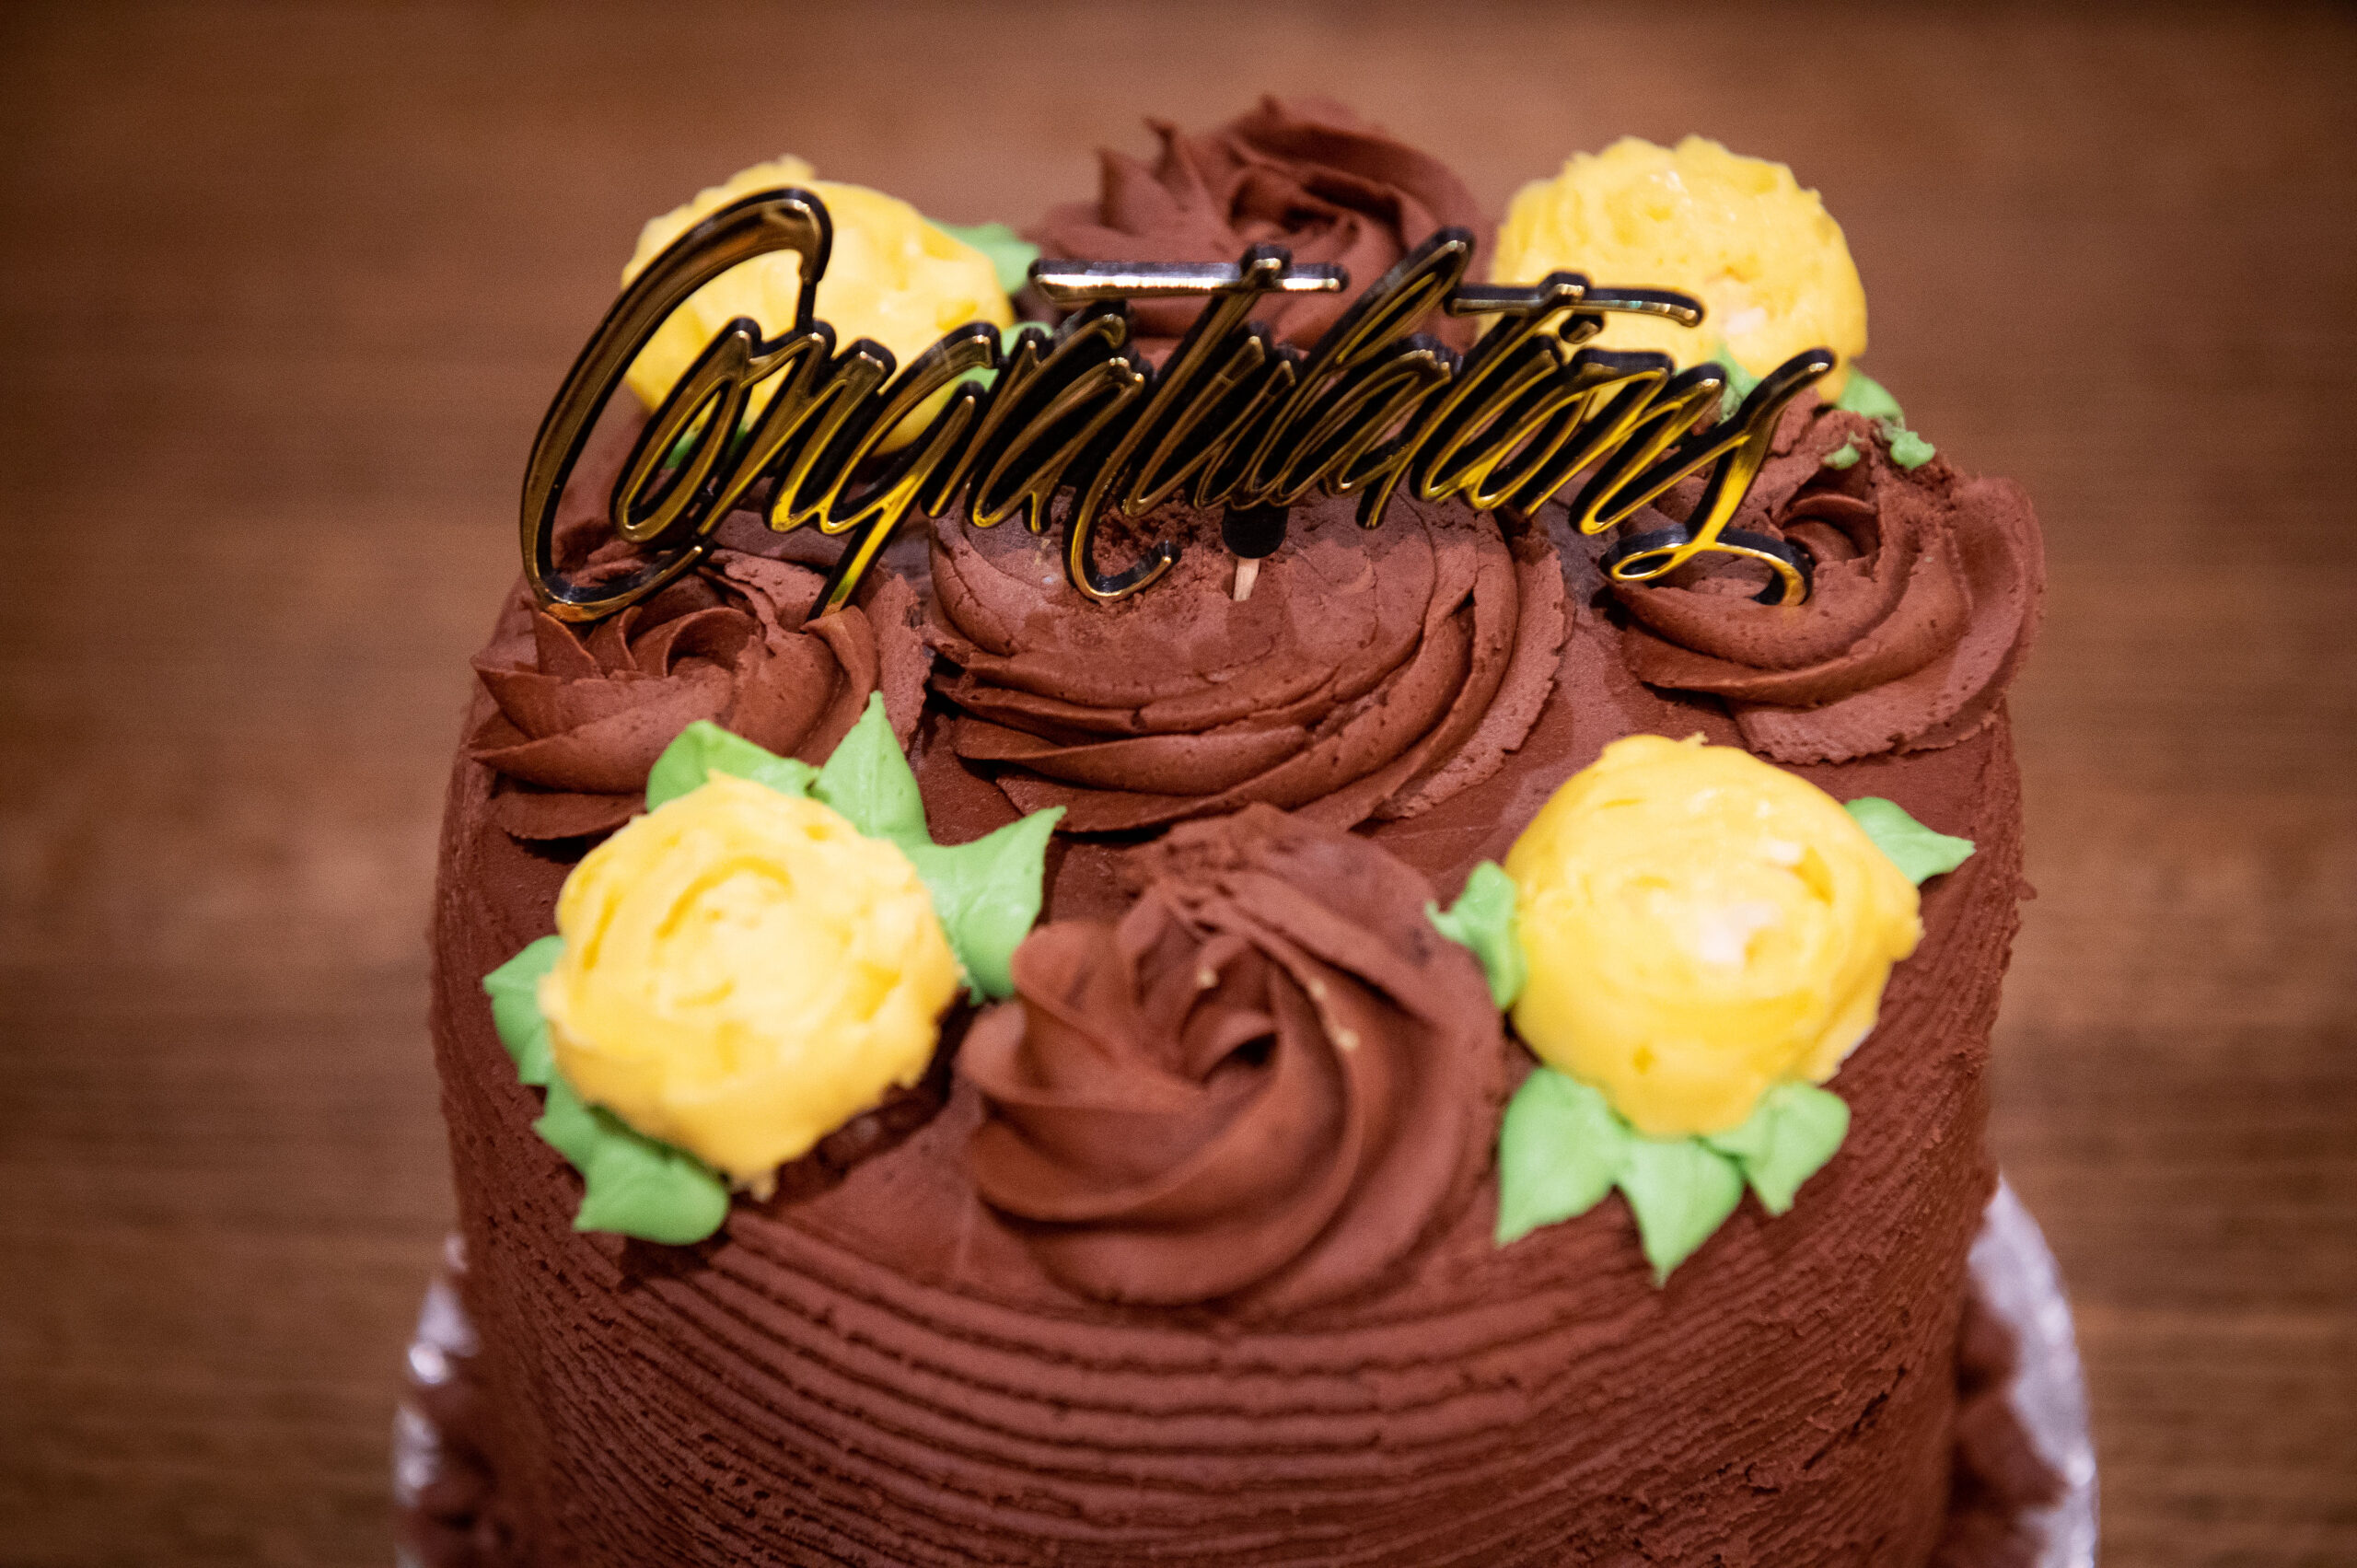
For my two-tiered wedding cake, I wanted a big array of flavors. The top tier was a refreshing lime cake with raspberry buttercream, while the bottom tier was a decadent chocolate cake with Nutella ganache and hazelnut frosting.
3. Determine Your Theme and Colors
Next, take some time to think about the colors and decorations you want for your cake, especially if you don’t already have a specific theme picked out for your wedding.
For example, you could design a look based on the venue, the cake flavors, or you and your soon-to-be-spouse’s favorite colors, movie, TV show, etc.
I’m a simple girl and just wanted some pretty flowers and piping.
Once you have a theme or color scheme picked out, I recommend looking up photos of similar cakes to get inspo for your design.

4. Plan Transportation
Make sure you have something sturdy to transport your cake in.
You can buy single-use cardboard cake boxes from Amazon. If you make a multi-tiered cake, though, expect to leave the top off.
Take your time transporting it. Don’t rush! A family member held my cake in their lap as we drove (very carefully) to the venue.
5. Make a Practice Cake
Before your wedding, make a practice cake. This doesn’t need to be exactly the same as your wedding cake, but it should be a similar size so you have a handle on constructing it.
In my case, I used my niece’s birthday to practice making a two-tiered cake. It was definitely way too big for her party, but it helped me figure out how to put together (and transport) a cake that size well before my reception.
6. Prepare What You Can in Advance
Baking, putting together, and decorating a wedding cake takes time. Seriously.
I totally underestimated how long my own wedding cake would take me to prepare, even after making a practice cake.
My advice? Bake your cake layers ahead of time and freeze them. You can also prepare buttercream a few days ahead. This way you don’t need to bake, make frosting, and decorate your cake all in one day.
7. Don’t Expect Perfection
As with anything you bake, don’t expect perfection the first time around.
It’s okay if your cake doesn’t turn out exactly as you hoped it would, or if something slips off the top, or if the buttercream starts to melt.
I wasn’t happy with the sides of my cake or my piping. And at my reception, the bottom tier suddenly began leaking ganache!
Even though there are many things I wish I’d done differently, I’m still proud of what I accomplished — and the fact that, despite how wonky my buttercream flowers looked, everybody raved about the cake.

Should You Make Your Own Wedding Cake?
Yes, if:
-
You’re hosting a small wedding/reception, with fewer than 70 guests (we had 20)
-
Your venue allows you to bring food that’s not from licensed vendors
-
You want to practice your cake decorating skills, such as techniques you saw online or learned in a cake decorating class
-
You want to save money — according to The Knot 2025 Real Weddings Study, couples spent an average of $540 on their wedding cake (I spent around just a quarter of that making my own)
No, if:
-
You’re expecting a ton of guests, or 70+ folks
-
You have a lot of other wedding planning on your plate (making a cake will simply add to the stress!)
-
You have no time to practice — you should aim to make at least one practice cake, especially if it’s multi-tiered, prior to your reception
-
You haven’t baked or decorated a cake before
Alternatives to Making Your Own Wedding Cake
-
Make cupcakes! Way easier to bake and decorate
-
Ask a family member or friend to make one as their wedding gift to you
-
Make various bite-sized desserts, such as cookies and brownies
-
Bake a smaller additional cake for guests with food allergies and/or dietary restrictions — this way you can still bake something without the pressure of supplying the main cake (the little chocolate cake pictured above was a dairy-free cake we made for a guest with allergies)
-
Make a small decorative cake for cutting and photos, then use a premade sheet cake to serve to guests
Feature Image Credit: Brian David Casey
Hannah is a passionate amateur baker, a prolific writer and editor, and the founder of Kneady Livin’. She is committed to providing fellow home bakers with tips, product recs, and helpful how-to guides. Her favorite baked goods to make include cakes, cupcakes, sourdough bread, cookies, and muffins. She hopes to open up her own cottage bakery in the near future.